Busbar power tap off units represent the critical physical interface between high-capacity longitudinal power distribution busways and the localized load requirements of server racks, industrial machinery, or facility sub-panels. In the context of modern cloud infrastructure and hyper-scale data centers, these units provide a modular, scalable solution that replaces traditional pipe-and-wire deployments. The primary problem addressed by these units is the inherent rigidity of fixed cabling; as compute density fluctuates, the ability to add, remove, or relocate power points without interrupting the entire busway feed is essential for maintaining high availability. These units act as a point of encapsulation for circuit protection and energy monitoring, ensuring that the payload of electrical energy is delivered with minimal overhead and maximum reliability. By integrating intelligent metering, they also mitigate the risks associated with thermal-inertia and phase imbalance, which are common catalysts for systemic failure in high-throughput environments. The following manual details the architectural requirements and deployment protocols necessary for these mission-critical components.
TECHNICAL SPECIFICATIONS
| Requirement | Default Port/Operating Range | Protocol/Standard | Impact Level (1-10) | Recommended Resources |
| :— | :— | :— | :— | :— |
| Voltage Rating | 208V to 480V AC | IEEE C37.20.1 | 10 | Grade 50 Copper/Aluminum |
| Amperage Capacity | 20A to 400A | NEC Article 368 | 9 | NEMA 3R/IP54 Housing |
| Logic Monitoring | Port 502 / Port 161 | Modbus-TCP / SNMP | 7 | ARM-based Logic Controller |
| Insulation Resistance | > 100 MΩ | IEC 61439-6 | 8 | Thermoset Plastic Mold |
| Data Throughput | 10/100 Mbps | Ethernet / RS-485 | 6 | Cat6 Shielded Cable |
| Thermal Margin | -25C to +40C | UL 857 | 8 | Active Convection Cooling |
THE CONFIGURATION PROTOCOL
Environment Prerequisites:
Successful integration of Busbar Power Tap Off Units requires strict adherence to physical and logical dependencies. First, installers must verify that the Busway Housing is de-energized or follows approved “live-plug” safety protocols per NFPA 70E. The infrastructure must support SNMP v3 or Modbus-TCP for telemetry. Ensure that the fluke-multimeter is calibrated within the last 12 months for primary voltage verification. User permissions for the Data Center Infrastructure Management (DCIM) system must include “Administrator” or “Write” access to register new Node IDs.
Section A: Implementation Logic:
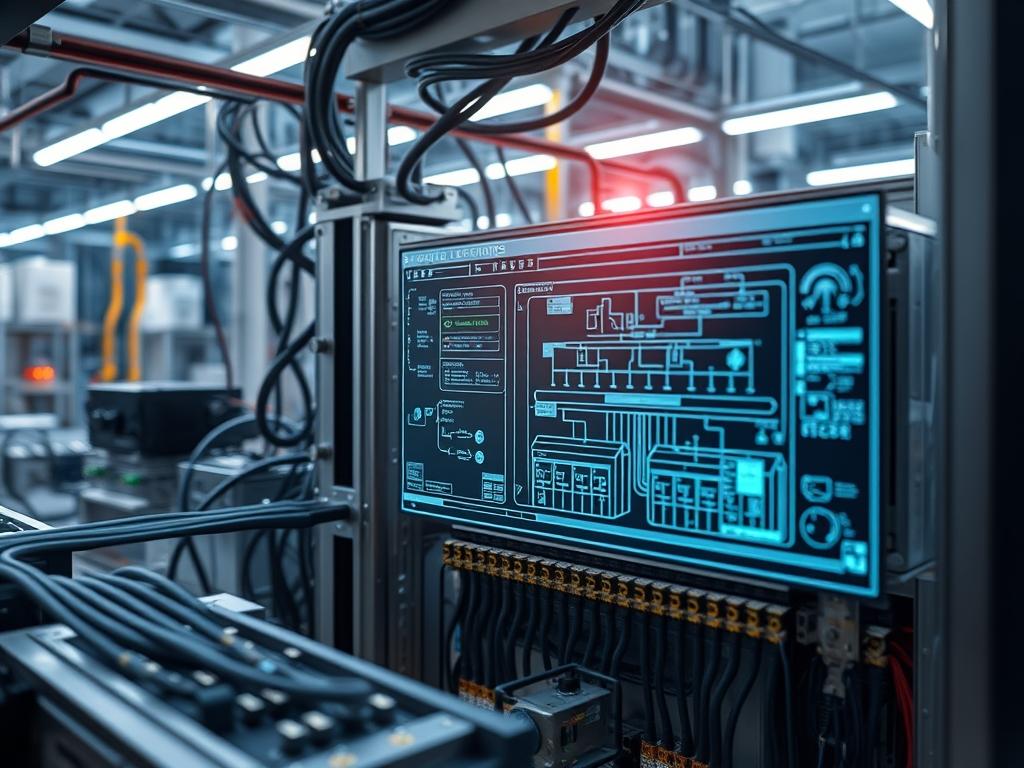
The engineering design of a tap off unit centers on mechanical and electrical synchronization. The mechanical interlock acts as a safety gate; it prevents the Plug-in Claws from engaging with the Busbar Conductors unless the internal Circuit Breaker is in the “OFF” position. This logic is idempotent, meaning repeated attempts to engage the unit while the breaker is active will fail consistently without damage to the hardware. Electrically, the unit performs a packet-like encapsulation of the electrical load, isolating it from the main busway loop so that a short circuit at the rack level does not cascade upstream. This design minimizes signal-attenuation in the monitoring circuit by placing the Current Transformers (CTs) directly at the point of contact, reducing the distance between data acquisition and the physical asset.
Step-By-Step Execution
1. Mechanical Alignment and Interlock Verification
Before physical contact, inspect the Tap Off Housing for debris. Align the Alignment Pins with the Busway Port slots. Ensure the Engagement Lever is retracted.
System Note: This action prepares the physical layer for connection; failing to align the pins correctly can cause mechanical signal-attenuation in the grounding path, potentially triggering a logic-controller fault during the initial handshake.
2. Physical Engagement and Latching
Push the unit firmly into the Busway Port until the Seating Tabs click into place. Rotate the Engagement Lever to the “LOCKED” position. Hand-tighten the Safety Bolts to the specified torque (typically 50 lb-in).
System Note: Engaging the lever physically drives the Copper Stabs into the Busbar Busway. This creates the primary electrical path; ensure the Safety Bolt is secured to prevent vibration-induced resistance, which increases thermal-inertia over prolonged high-current operation.
3. Circuit Protection and Logic Initialization
Toggle the Circuit Breaker to the “ON” position while monitoring the LED Diagnostics Panel. Use the fluke-multimeter to verify L1-L2, L2-L3, and L1-L3 voltages at the Output Receptacle.
System Note: Moving the breaker to “ON” closes the circuit and initializes the internal Energy Meter. The logic-controller will begin its boot sequence; use systemctl status power-monitor if accessing the internal gateway via a terminal to verify the service status.
4. Network Integration and SNMP Configuration
Connect the Shielded Ethernet Cable to the RJ45 Port. Access the unit’s default IP address via a web interface or SSH. Configure the syslocation and syscontact strings. Set the SNMP Read Community to your organizational standard.
System Note: Running chmod 600 /etc/snmp/snmp.conf on the management server ensures that sensitive community strings are protected. This connection allows the DCIM to pull metadata regarding power consumption and load balance.
5. Load Distribution Verification
Connect the Rack PDU to the Tap Off Unit output. Observe the Throughput metrics on the DCIM Dashboard. Confirm that the Payload (current draw) matches the expected server startup profiles.
System Note: The monitoring-service should now reflect real-time amperage. High latency in reporting may indicate a network bottleneck or excessive packet-loss in the site-wide management VLAN.
Section B: Dependency Fault-Lines:
The most common mechanical bottleneck is the misalignment of Busbar Stabs, leading to “Arcing” errors or localized hotspots. In the logical layer, the most frequent failure is a conflict in Modbus Unit IDs; if two units share an ID, the logic-controller will return garbled data or time-out errors. Furthermore, signal-attenuation in RS-485 daisy-chains often occurs when the total cable length exceeds 1,200 meters without a repeater, or when the 120-ohm Termination Resistor is missing at the end of the run. Electrical bottlenecks include excessive Total Harmonic Distortion (THD), which can confuse the Energy Metering Chip, resulting in inaccurate billing or load-shedding triggers.
THE TROUBLESHOOTING MATRIX
Section C: Logs & Debugging:
When a fault occurs, technicians should immediately inspect the path /var/log/power/events.log for specific error strings. Common strings include “OVERCUR_WARN” (indicating the load has exceeded 80 percent of the breaker rating) or “PHASE_IMBAL_ERR” (indicating a deviation of more than 15 percent between phases). Physical cues are equally vital: a glowing red Status LED on the Logic Controller typically points to a failure in the Current Transformer secondary circuit. If the unit is unreachable via the network, use ping and traceroute to check for packet-loss at the Aggregator Switch. If the web interface is slow, verify the concurrency limits on the Management Gateway; too many simultaneous polls can increase latency and cause the unit’s low-power CPU to hang.
OPTIMIZATION & HARDENING
– Performance Tuning: To maximize thermal efficiency, maintain a minimum clear space of six inches around the Tap Off Unit vents. Reduce SNMP Polling Overhead by setting the refresh interval to 60 seconds rather than 5 seconds for non-critical loads; this preserves Logic Controller resources and reduces network throughput clutter.
– Security Hardening: Immediately change the default admin credentials using the passwd command or the secure web portal. Apply Firewall Rules at the gateway level to restrict Port 502 and Port 161 traffic to known Management IP ranges. Disable unused services like Telnet or HTTP in favor of SSH and HTTPS.
– Scaling Logic: When expanding the busway run, calculate the total Voltage Drop across the entire length. As more Busbar Power Tap Off Units are added, the cumulative Thermal-Inertia of the room increases. Ensure the CRAC (Computer Room Air Conditioning) units are set to accommodate the increased heat rejection of the busway assembly under full load. Maintain an idempotent configuration backup for all units so that a replacement unit can be deployed with the same settings instantly.
THE ADMIN DESK
1. How do I reset a locked Interlock?
Ensure the Circuit Breaker is fully in the “OFF” position. Apply slight inward pressure to the Housing while sliding the Engagement Lever to the “RELEASE” position. Check for obstructions in the Busbar Port before re-attempting.
2. Why is the Energy Meter reading zero while the load is active?
Check the Current Transformer (CT) secondary plug. If the connector is loose, the Logic Controller will not receive a signal. Ensure the Polarity of the CT is correct relative to the direction of the load.
3. How do I mitigate Signal-Attenuation on long runs?
Ensure all RS-485 Shields are grounded at a single point only to prevent ground loops. Install a Modbus Repeater if the daisy-chain exceeds 32 devices or if the cable run goes through high-EMI environments near heavy motors.
4. What causes a “Phase Imbalance” alarm?
This typically occurs when single-phase loads are not distributed evenly across L1, L2, and L3. Review the Rack PDU connections and re-patch loads to balance the Amperage across the three phases to within 10 percent of each other.
5. Can I hot-swap the Monitoring Logic?
Most modern Busbar Power Tap Off Units feature a modular Logic Controller that can be swapped while the breaker is active. However, this only applies to the data module; never attempt to service the Power Stabs while the unit is energized.

