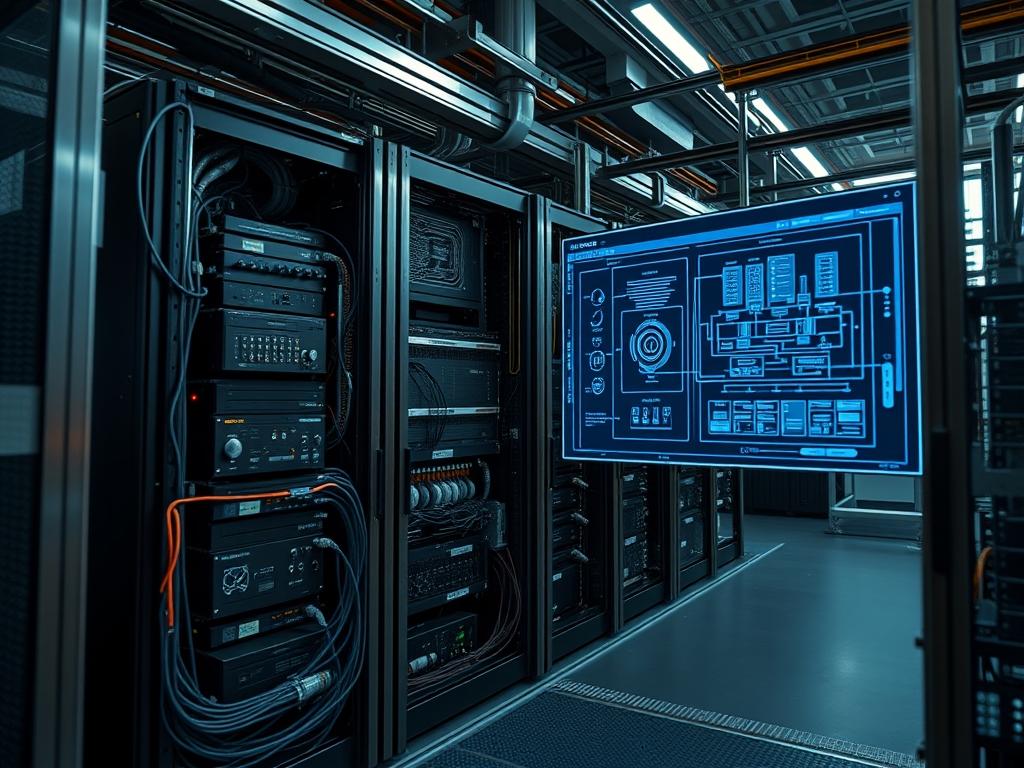
Modern AI infrastructure demands an architectural shift in energy distribution to accommodate the unprecedented density of GPU clusters. Traditional 12V power delivery systems are no longer viable for high-performance computing due to excessive resistive losses and thermal-inertia. Effective ai rack power delivery now necessitates the transition to 48V or 54V DC busbar architectures. This manual addresses the integration of high-voltage components intended to support 100kW or greater per cabinet. The move to 48V reduces I2R losses by a factor of 16 compared to standard 12V systems; this facilitates the massive current throughput required by modern enterprise accelerators. This infrastructure sits at the nexus of energy management and compute efficiency. Engineers must solve the challenge of transient load spikes where current demand can jump from 10 percent to 90 percent in microseconds. By centralizing AC-to-DC conversion in a dedicated power shelf and distributing DC via a rigid busbar, facilities achieve higher efficiency and simpler cooling requirements than fragmented, server-side conversion methods.
Technical Specifications
| Requirement | Default Port/Operating Range | Protocol/Standard | Impact Level (1-10) | Recommended Material/Grade |
| :— | :— | :— | :— | :— |
| Primary AC Input | 415V – 480V 3-Phase | IEC 60309 / NEMA L22 | 10 | 99.9% Oxygen-Free Copper |
| DC Busbar Voltage | 48VDC – 54VDC | OCP V3 / IEEE 1675 | 10 | Silver-Plated Copper |
| Busbar Current Capacity | 2000A – 4500A | NEC Article 368 | 9 | C11000 ETP Copper |
| Monitoring Protocol | Port 502 / TCP | Modbus / PMBus 1.3 | 7 | Category 6A Shielded |
| Management Interface | Ethernet / RJ45 | IPMI 2.0 / SNMP v3 | 8 | Solid State Flash |
| Thermal Dissipation | Liquid/Air Hybrid | ASHRAE Class A1 | 9 | High-Flow Fin Arrays |
The Configuration Protocol
Environment Prerequisites:
Reliable ai rack power delivery deployment requires strict adherence to international safety and communication standards. Ensure the environment meets NEC Article 708 for critical operations power systems. Required software includes a Linux-based management node running Ubuntu 22.04 LTS or RHEL 9.2 with ipmitool and modbus-cli installed. Hardware must include a 3-Phase Power Distribution Unit (PDU) and a rack-level Power Shelf containing at least six 5.5kW high-efficiency rectifiers. User permissions must be set to root or delegated via sudo to manage low-level hardware drivers and logic controllers.
Section A: Implementation Logic:
The engineering design centers on the principle of centralized rectification to mitigate the payload overhead at the individual server tray. By converting AC to DC at the top or middle of the rack, we reduce the count of power supply units per node; this increases the volumetric compute density. The busbar acts as a low-impedance electrical backbone. We utilize 48V because it remains below the 60VDC safety threshold while significantly lowering the current (Amperage) needed for a given power level. Lower amperage allows for thinner, more manageable conductors compared to a 12V setup of the same capacity. The design must be idempotent; repeated applications of the power-on signal should result in the same stable state without inducing surges or voltage oscillations that could damage the GPU silicon.
Step-By-Step Execution
1. Physical Busbar Alignment and Torque Verification
Install the Vertical Busbar Assembly along the rear of the rack frame using non-conductive standoffs. Use a fluke-64-ir-thermometer to establish a baseline ambient temperature. Tighten all electrical connections to the specified torque using a calibrated torque-wrench to prevent high-resistance hotspots.
System Note: Precise physical coupling ensures low signal-attenuation of the power signal and prevents the thermal expansion of copper from loosening joints; this protects the long-term integrity of the physical layer.
2. Rectifier Initialization and Phase Balancing
Insert the Rectifier-Modules into the Power-Shelf. Connect to the management console and verify the input phase balance using the command ipmitool -H
System Note: Phase balancing reduces the harmonic distortion introduced back into the facility grid; it prevents the accidental tripping of upstream circuit breakers during high concurrency events.
3. Logic Controller Connectivity and Protocol Bindings
Configure the RS-485 or Ethernet gateway to enable the Modbus-TCP bridge. Use systemctl start modbus-gateway to initialize the polling service. Bind the vendor-specific MIB-files to your monitoring suite to translate raw hex values into readable voltage and current telemetry.
System Note: This step creates the software abstraction layer; the kernel can now interrupt or throttle the compute load if the power delivery metrics exceed safe operating bounds.
4. Voltage Margin Tuning and Droop Compensation
Adjust the output voltage setpoint to 51.5VDC via the PMBus interface using the command modbus-cli -w 40001 51500. This higher setpoint accounts for “voltage droop” during sudden load steps when GPUs transition from idle to full training workloads.
System Note: Setting a slightly elevated baseline voltage provides a buffer against transient drops; this maintains the voltage above the minimum threshold of the server-side point-of-load converters.
5. Final Load Testing and Thermal Checkout
Initiate a synthetic load test using gpu-burn or a similar stress-test utility on all nodes simultaneously. Monitor the Busbar-Temperature-Sensors and the Power-Shelf-Logs at /var/log/power/shelf.log for any signs of instability or excessive heat.
System Note: This validates the thermal-inertia management of the rack. High throughput during this stage ensures the cooling infrastructure can keep pace with the electrical energy being converted into heat.
Section B: Dependency Fault-Lines:
The most critical bottleneck in ai rack power delivery is the mechanical interface between the server tray and the busbar. If the clip-on connectors are misaligned, the resulting micro-arcing causes rapid oxidation and eventual failure. Furthermore, software dependencies such as specific versions of OpenIPMI can lead to “ghost” sensor readings if the firmware on the rectifiers is not matched with the management agent. Another significant risk is the “cold-start” surge. If the entire rack attempts to draw current simultaneously without a staggered-start logic, it may trigger the over-current protection (OCP) at the primary utility transformer.
THE TROUBLESHOOTING MATRIX
Section C: Logs & Debugging:
When a failure occurs, the first point of analysis should be the PDU-Event-Log. Look for the error string “V_OUT_LOW” or “I_LIMIT_EXCEEDED”. These typically indicate a short circuit or an imbalanced compute load across the trays.
Physical Fault Codes:
– Flashing Amber LED on Rectifier: Indicates a fan failure or internal over-temperature condition.
– Solid Red LED on Busbar Monitor: Indicates a ground fault or insulation breakdown.
– Log Path: Check /var/log/syslog for “Modbus Timeout” messages; this implies a failure in the communication bus between the shelf and the top-of-rack switch.
To verify the sensor readout, run sensors on the host OS to compare the localized VRM (Voltage Regulator Module) readings with the global busbar telemetry. If there is a discrepancy of more than 2 percent, check the mechanical tension of the busbar connectors.
OPTIMIZATION & HARDENING
Performance Tuning:
To maximize efficiency, implement “Phase-Shedding” on the rectifiers. This logic disables specific power modules during low-utilization periods; this ensures the remaining active modules operate at their peak efficiency curve (typically 50 percent to 80 percent load). Use a script to trigger systemctl restart power-manager with custom parameters based on the time of day or scheduled training jobs.
Security Hardening:
The electrical infrastructure is a target for physical and cyber disruption. Disable all unencrypted protocols like Telnet or HTTP on the Management-Controller. Enforce SSH-Key-Authentication for all administrative access. Use iptables to restrict access to the Modbus/TCP port only to the IP of the central monitoring server.
Scaling Logic:
As the cluster grows, maintain high-voltage integrity by utilizing modular busbar segments with interlocking splices. Ensure that the “Short-Circuit Current Rating” (SCCR) of your updated configuration still complies with local electrical codes. When adding new racks, implement a Master-Slave power coordination protocol to synchronize the peak-shaving batteries if the facility uses a localized UPS.
THE ADMIN DESK
Q: Why is my busbar temperature rising above 65C?
Check the torque on the physical bolts immediately using a fluke-multimeter in temperature mode. Loose connections increase resistance, generating heat. Also, verify that the airflow path is not obstructed by poorly managed cabling.
Q: How do I resolve a “Communication Lost” error on the PDU?
Restart the snmpd service and verify the physical RJ45 connection. Check for electromagnetic interference if the data cables are run too close to the high-voltage busbar without proper shielding or separation.
Q: Can I mix different brands of rectifiers in one shelf?
This is not recommended. Different manufacturers use proprietary load-sharing algorithms. Mixing them can lead to “current-hogging” where one module carries the entire load until it fails, causing a cascading shutdown of the rack.
Q: What is the benefit of 54V over 48V?
The 54V setpoint is often used in OCP V3 designs to provide additional headroom for voltage drops across the connector interface. It allows for more efficient power usage by the server’s down-converters while remaining within safe limits.
Q: How often should I inspect the busbar connectors?
Perform a thermal scan using an IR-camera every six months. Conduct a physical inspection and re-torque of the mounting hardware during every major hardware refresh or at least once every 24 months to ensure contact integrity.

