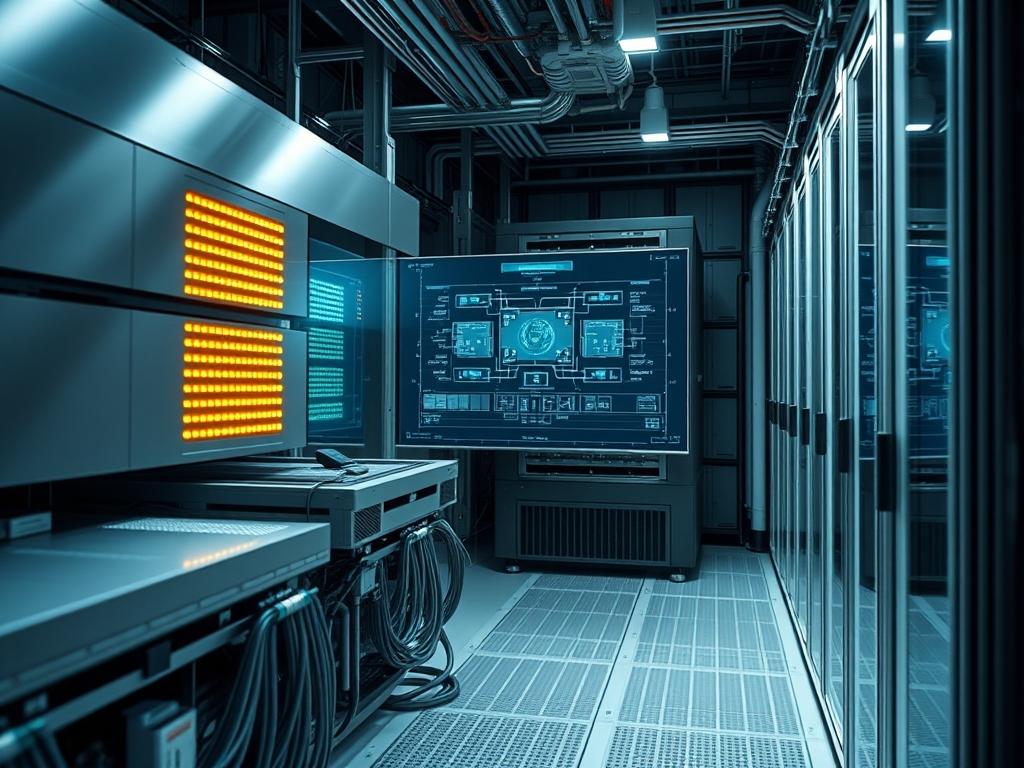
Engineering the modern ai supercomputer node layout requires a shift from traditional server density toward integrated thermal and electrical ecosystems. The node layout serves as the fundamental building block within the broader infrastructure of high density data centers; specifically where liquid cooling, 400G to 800G networking, and multi-kilowatt power delivery converge. Unlike standard enterprise racks; an AI supercomputer configuration must account for extreme thermal-inertia and the physical weight of liquid-cooled accelerators. The primary challenge remains the mitigation of signal-attenuation while maintaining a compact footprint that reduces the physical path length of copper and optical interconnects. A faulty layout leads to excessive packet-loss and increased latency during massive all-reduce operations. By optimizing the spatial arrangement of the GPU nodes, InfiniBand switches, and Coolant Distribution Units (CDUs), engineers ensure that the computational payload is processed with minimal overhead. This manual delineates the precise specifications required to deploy, integrate, and harden these intensive compute clusters.
TECHNICAL SPECIFICATIONS
| Requirement | Default Port/Operating Range | Protocol/Standard | Impact Level (1-10) | Recommended Resources |
| :— | :— | :— | :— | :— |
| Power Density | 60kW to 120kW per Rack | IEC 60309 / 3-Phase | 10 | 415V/480V Circuits |
| Thermal Management | 18C to 25C (Secondary Loop) | ASHRAE W4/W5 | 9 | Liquid-to-Liquid CDU |
| Interconnect Fabric | 400Gbps to 800Gbps | NDR/XDR InfiniBand | 9 | OSFP/QSFP-DD Transceivers |
| Node Memory | 1TB to 4TB per Node | DDR5/HBM3e | 8 | ECC Registered RAM |
| Storage Throughput | 50GB/s to 200GB/s | NVMe-oF / GPUDirect | 7 | PCIe Gen5 Fabric |
| Grounding Impedance | < 1.0 Ohm | IEEE 1100 / NEC | 8 | 2/0 AWG Grounding Wire |
| OS / Kernel | 5.15+ Standard Kernel | RHEL 9 / Ubuntu 22.04 | 6 | Minimum 32GB Boot Drive |
THE CONFIGURATION PROTOCOL
Environment Prerequisites:
Installation necessitates adherence to NEC Article 645 for Information Technology Equipment. Ensure the facility provides a raised floor or overhead containment capable of supporting 3,500 lbs per square foot. Software requirements include NVIDIA PEERDIRECT, OFED drivers version 5.8 or higher, and the UCX (Unified Communication X) framework. User permissions must be configured at the sudoers level for physical hardware control and systemctl modifications. All technicians must utilize a fluke-multimeter for verifying circuit isolation before connecting the Power Distribution Units (PDUs).
Section A: Implementation Logic:
The logic of the ai supercomputer node layout centers on the spine-leaf topology characterized by the “Fat-Tree” architecture. This design minimizes the hop count between any two nodes; effectively reducing the latency associated with message passing interface (MPI) calls. By placing high-bandwidth switches at the mid-point of the rack, we reduce the cable length for copper-based DACs. This prevents signal-attenuation that often plagues longer runs. Thermal logic dictates that cold-aisle containment is no longer sufficient; therefore; we transition to direct-to-chip liquid cooling where the coolant manifold acts as a primary heat sink for the GPU and CPU complexes. This setup is idempotent: repeating the deployment across 100 racks should yield the exact same environmental and performance profile regardless of the starting state.
Step-By-Step Execution
1. Structural Validation and Rack Leveling
Use a laser leveling tool to ensure the rack is perfectly vertical before populating the nodes. Secure the rack to the structural sub-floor using 0.5-inch diameter Grade 8 bolts.
System Note: Proper leveling prevents mechanical stress on the backplane and ensures that liquid cooling connectors (quick-connects) align without putting lateral pressure on the motherboard or PCIe lanes.
2. Coolant Manifold Integration and Pressure Testing
Install the vertical coolant manifolds on the rear of the rack. Connect the CDU to the secondary loop and perform a dry-run pressure test at 1.5x the operating pressure.
System Note: Use sensors integrated with the Building Management System (BMS) to monitor for pressure drops. A drop in pressure triggers an immediate shutdown via the logic-controllers to prevent an aqueous-related short circuit.
3. High-Density PDU Mounting and Phase Balancing
Mount the vertical PDUs and distribute the load across three phases. Verify that no single phase exceeds 80 percent of its rated capacity to prevent thermal tripping.
System Note: Monitor power usage using snmpwalk or ipmitool to pull real-time amperage from the PDU management card. This prevents localized heat spikes in the electoral infrastructure.
4. Node Installation and Interconnect Mapping
Slide the compute nodes into the designated U-positions. Connect the NDR InfiniBand cables from the node HCA (Host Channel Adapter) to the leaf switches following the predefined port map.
System Note: Use ibstat and ibnetdiscover to verify that all nodes are visible on the fabric. Check for link-width degradation; a 4x link running at 1x indicates physical layer issues or signal-attenuation.
5. Kernel Tuning and Driver Alignment
Boot the operating system and install the specific version of the MLNX_OFED stack. Modify the /etc/security/limits.conf to allow unlimited memlock for RDMA operations.
System Note: Use systemctl enable –now openibd to start the InfiniBand services. This step ensures that the kernel can bypass traditional networking stacks to enable zero-copy data transfers between GPU memories.
6. Thermal Limit Configuration
Set the BIOS and OS-level thermal trip points. Configure the ipmi thresholds to initiate a graceful shutdown if the coolant temperature at the intake exceeds 30C.
System Note: Running sensors or nvidia-smi -q provides the real-time thermal profile. Setting these limits protects the hardware from thermal-inertia where heat continues to rise even after the workload stops.
Section B: Dependency Fault-Lines:
The most common mechanical bottleneck occurs during the mating of the liquid-cooling quick-connects. If the O-ring is slightly misaligned; a micro-leak can develop that does not manifest until the system reaches full pressure. Hardware-software conflicts often arise when the PCIe Generation mismatch occurs; putting a Gen5 card in a Gen4 slot limits the throughput to 50 percent of the potential. Furthermore; ensure that the InfiniBand Subnet Manager (SM) is running on at least two independent switches. If the SM fails; the entire cluster fabric becomes unreachable; leading to a total loss of concurrency across the AI training job.
THE TROUBLESHOOTING MATRIX
Section C: Logs & Debugging:
When a node fails to communicate; the first point of inspection is the System Journal. Use journalctl -u openibd to check for driver initialization errors. If the issue is physical; check the dmesg | grep -i pcie log for AER (Advanced Error Reporting) strings that indicate failing lanes.
- Error: “ib_write_bw: No route to host”: This usually indicates the Subnet Manager is down or the port is in the “Initial” state. Check the physical link lights on the ConnectX-7 card.
- Error: “GPU-Direct RDMA: allocation failed”: Check the BIOS settings for “Above 4G Decoding” and “Base Address Register (BAR)” sizes. Ensure they are enabled.
- Physical Code: Amber Flashing LED on PSU: This denotes a phase imbalance or an over-current protection trigger. Check the PDU logs for the specific outlet amperage.
- Log Path: /var/log/messages: Scan for “Out of Memory” (OOM) killer events that might have terminated the MPI process due to excessive overhead or leaked buffers.
OPTIMIZATION & HARDENING
Performance Tuning:
Maximum throughput is achieved by tuning the MTU (Maximum Transmission Unit) to 4096 on the InfiniBand fabric. Additionally; pinning the CPU cores to the specific NUMA node associated with the local GPU reduces the internal bus latency. Use numactl –physcpubind to enforce this locality. This reduces the overhead of cross-socket memory access; which is critical for large language model (LLM) training.
Security Hardening:
Restrict access to the Management Network (BMC/IPMI) using a dedicated VLAN and physical copper isolation. Implement firewalld rules that only permit SSH and SNMP from an authorized jump-box. For the physical layer; ensure that all unused USB ports are disabled in the BIOS and that the rack doors are integrated into the facility’s security system. Use chmod 600 on all sensitive configuration files containing fabric keys or administrative passwords.
Scaling Logic:
To maintain performance during expansion; utilize the “Leaf-Spine” scaling model. As you add more racks of ai supercomputer node layout units; ensure the “Spine” switches have enough uplink capacity to maintain a non-blocking 1:1 oversubscription ratio. This prevents congestion at the top-of-rack level as inter-rack traffic increases.
THE ADMIN DESK
How do I verify the InfiniBand topology is correct?
Run the ibnetdiscover command and compare the output to your cabling map. It identifies every node and switch in the fabric. Any missing links indicate a cabling fault or a dead transceiver causing packet-loss.
What is the safe operating temperature for liquid cooling?
For W4/W5 ASHRAE standards; the secondary loop coolant should enter the rack between 18C and 25C. If it exceeds 32C; the GPU clocks will throttle; drastically reducing the computational throughput of your AI workloads.
How is signal-attenuation managed in high-speed fabric?
Keep high-speed copper DAC cables under 3 meters. For any distance beyond that; use active optical cables (AOCs) or transceivers. Optical fiber eliminates the electromagnetic interference that causes massive packet-loss at 400Gbps speeds.
Why does my node crash during high-concurrency training?
Check the kernel’s memory allocation for RDMA. If the payload exceeds the pinned memory limits; the system will fault. Ensure that the ulimit -l is set to “unlimited” for all users running high-performance computing tasks.
How do I check for micro-leaks in the cooling system?
Monitor the CDU floor sensor and the pressure differential between the supply and return manifolds. A steady decline in pressure; even by 0.1 PSI over an hour; signifies a leak that requires an immediate physical audit.

